The particular BSOD with the error name Reference_by_pointer or a stop code 0x000018 is a memory issue mostly spawned by faults in drivers. You could easily solve this problem by updating the drivers in your system. But there can be some other issues hindering the process. So, you will need a few workarounds depending on the causes. In this guide, we are going to identify the possible causes for the error and provide the working fixes.
Why Does Windows Show the “Reference By Pointer” BSOD?
When the system performs any task, it stores the individual processes as objects in memory. The driver software handling the task calls pointers that denote the objects’ memory addresses. Every time it calls a pointer, it increases the reference count by one and reduces it by one after removing the pointer. If the reference count varies inconsistently, Windows will display the blue screen with the Reference_by_pointer error. For instance, if the object is still open while the reference count is reduced to zero, Windows identifies this as a bug and shows the BSOD.
How to Fix “Reference By Pointer” BSOD
In some systems, the Blue screen errors may get fixed after the automatic restart. While some PCs reopen after the error, works for a while, and display the error again.
Outdated or corrupted drivers Corrupt system files Incompatible hardware, especially Plug and play devices Malware and Virus Hindering system process by Antivirus software Overclocking Faulty programs Damaged hardware
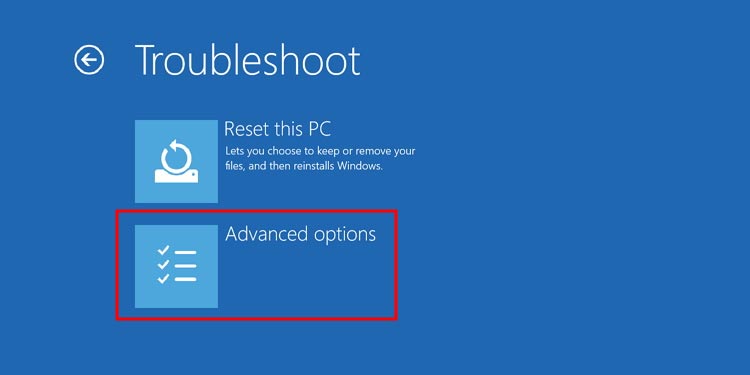
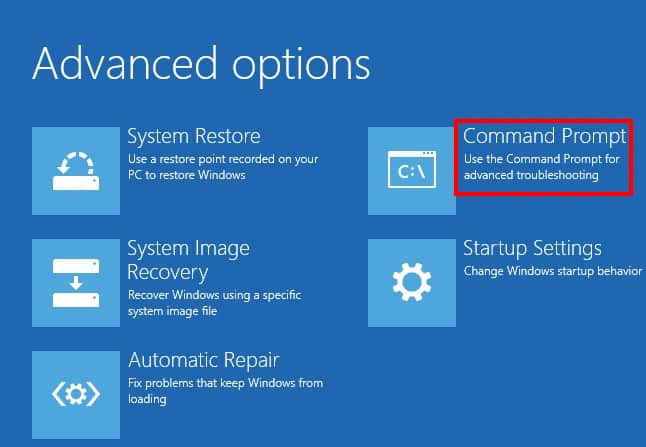
But if your system does not open at all and gets in the BSOD loop, then you should boot the PC in safe mode to perform the fixes. Similarly, you can run the fixes such as SFC scan and DISM scan by opening the command prompt from the recovery environment. Before diving into the fixes, remove all the peripherals and restart your system. Sometimes, new hardware and their drivers may be interfering with the system. If the issue persists, let’s fix it in your system right away.
Search for the Particular Cause
A computer runs a number of programs, drivers, and system processes that anything may have caused the error. So, diagnosing the error for the particular cause is the first step while solving the BSOD. Let’s see the methods you can use to find the cause.
Find the Name of Error File in Blue Screen
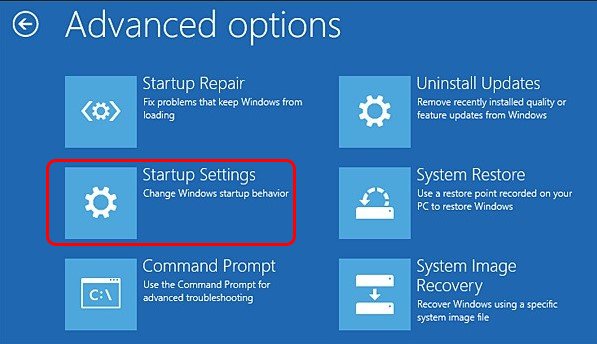
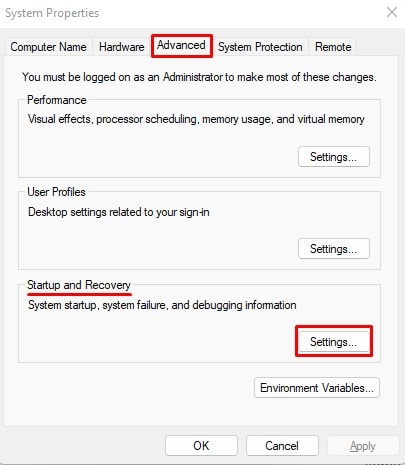
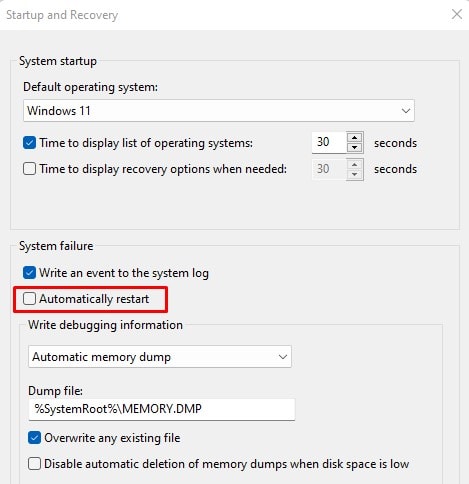
Sometimes, the Reference by pointer BSOD displays the name of the file or process responsible for it. Errors in Atikmdag.sys, wdf01000.sys, tcpip.sys, ntoskrnl.exe, etc., are some of the frequent files the BSOD shows. If you look at the details of Atikmdag.sys, you will find that this manages the graphics drivers. And you can move on towards resolving that particular driver software by either reinstalling or removing them. But your system may restart automatically after showing the blue screen, and you may not be able to note the name. So, you should disable automatic restart during system failure. Let’s see the way to do it. Next time the BSOD appears, note the name and search for the error.
Look Through the Mini Dump File
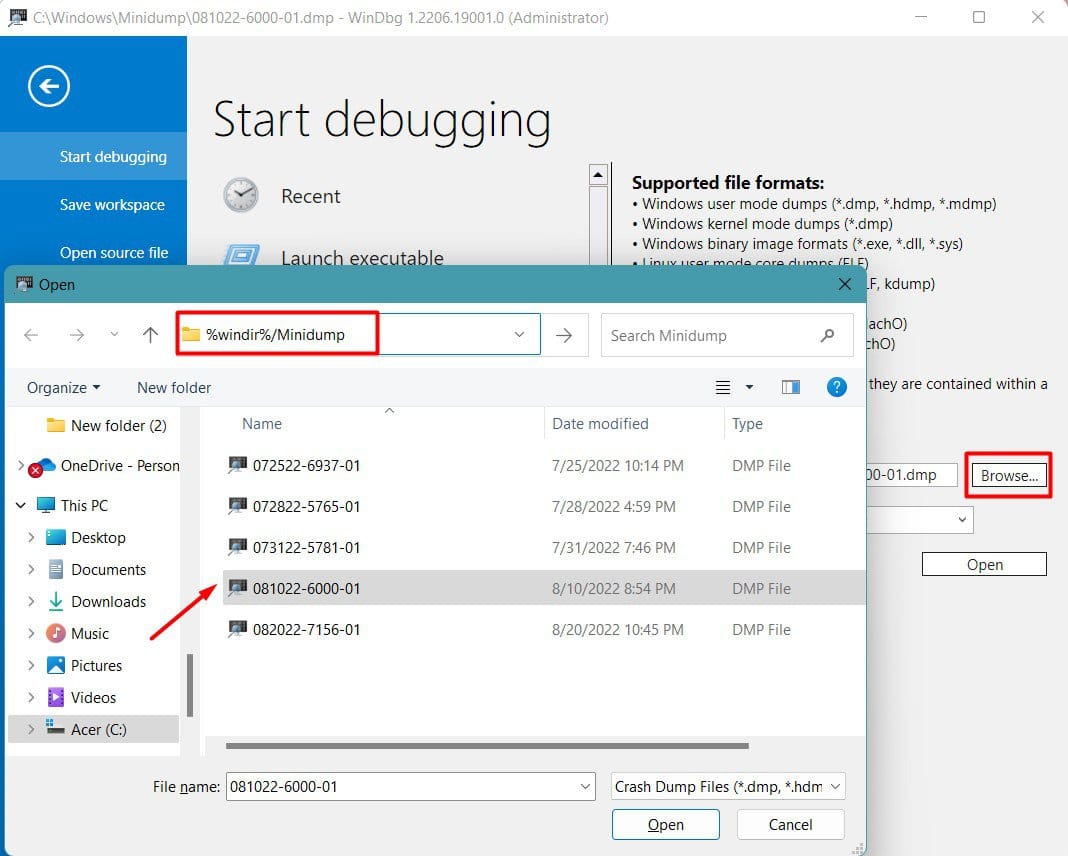
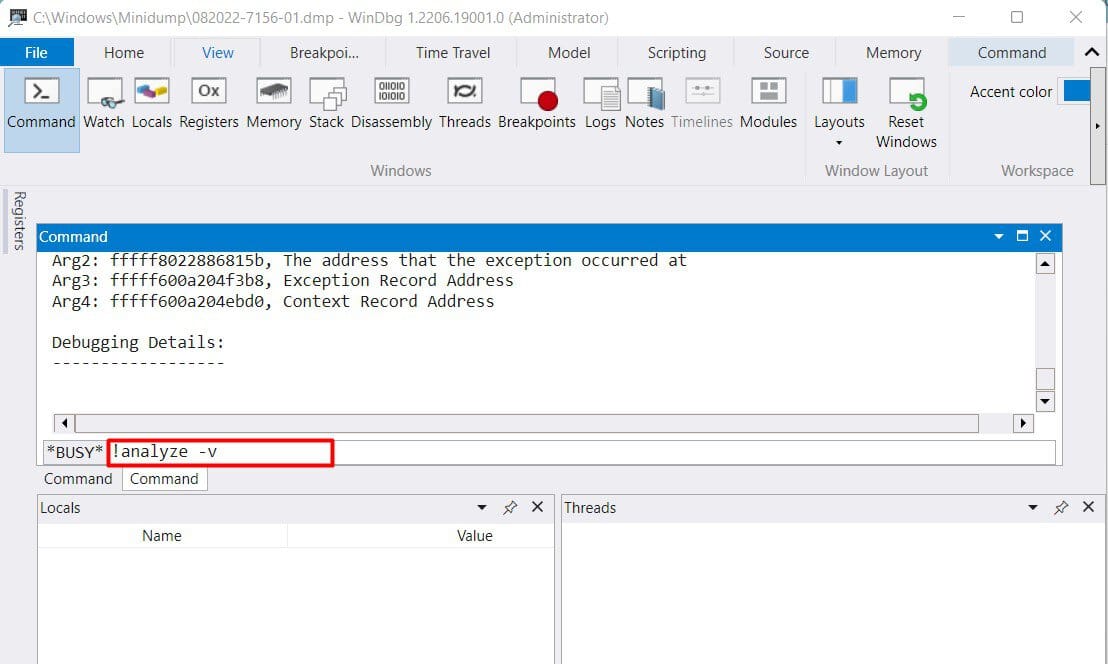
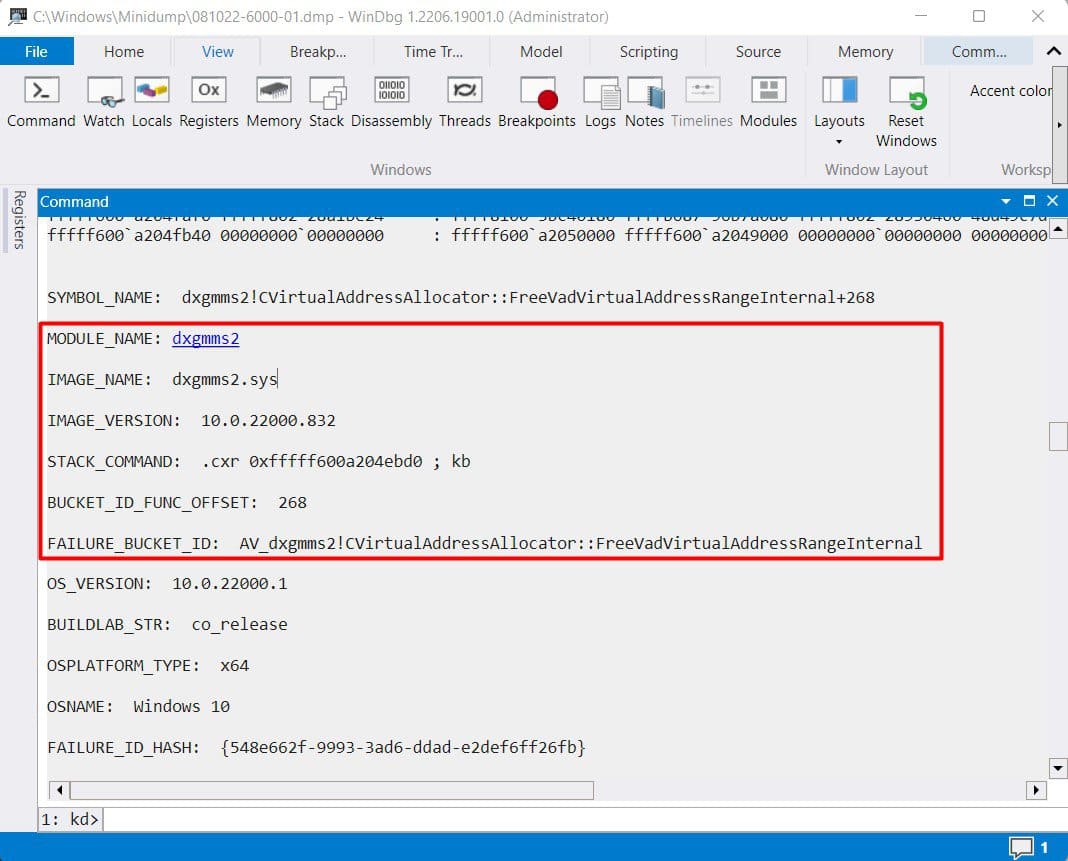
Your computer saves the error details and diagnostic reports in a dump file when a BSOD appears. You can then look into the file to see what actually causes the issue and move towards fixing it. But, you will need a separate program, WinDbg, to view the dump files. Let’s see the way to access the minidump using WinDbg. Proceed to resolve the problem after finding the cause. Sometimes, the program or file may not be the actual problem, and other bugs may be interfering with it. So, you should also look for other processes in the dump file that may be the real issue. You can find the minidump files details on the internet if the cause is unclear to you.
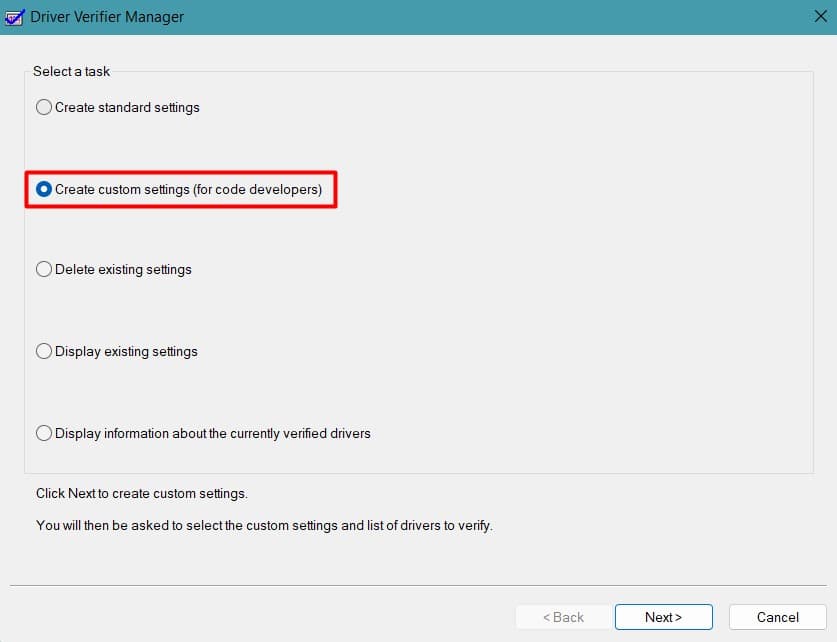
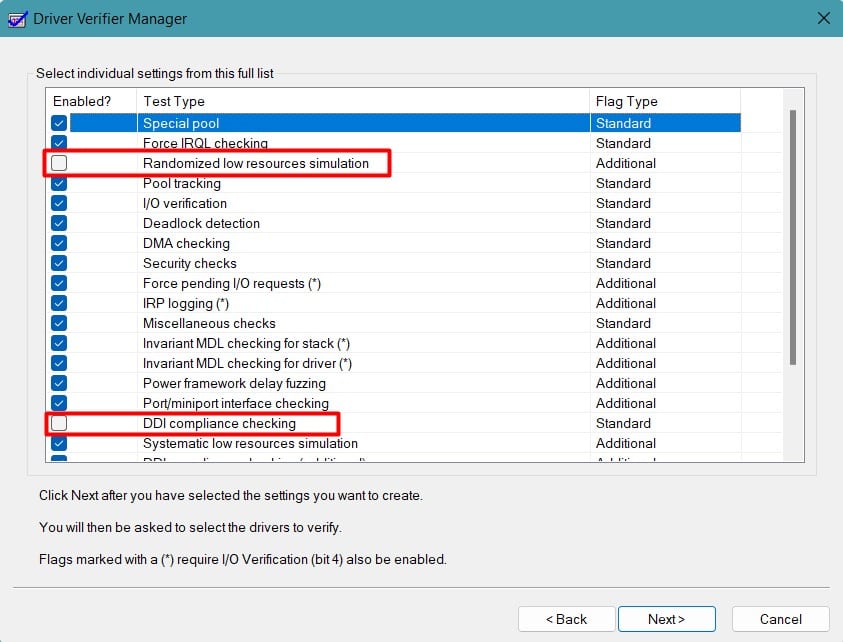
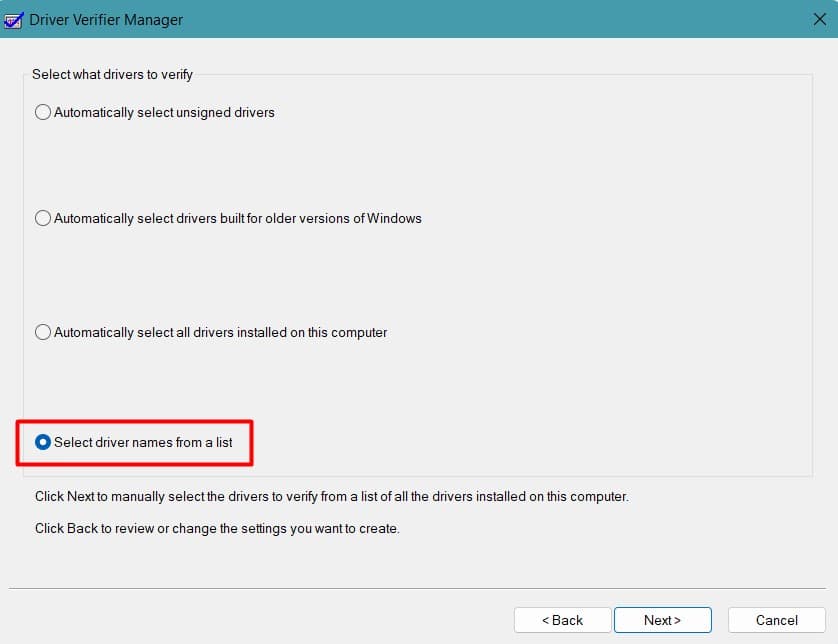
Run Driver Verifier
As we mentioned earlier, the BSOD is mostly caused by faults in drivers. So, it is beneficial to find the faulty one and reinstall or remove it. Driver verifier is a program that runs diagnostic tests on the drivers. It puts them under maximum stress and shows a BSOD with Driver_Verifier_Violation_Detected if it finds any issue. Then, you can check the minidump file to identify the cause. Now, Let’s see how you can run the Driver verifier. If it finds the error, you can check the minidump file and rectify the issue. You should stop the Driver verifier by entering the command verifier /reset in the command prompt. Using the Driver verifier is risky. Sometimes, the driver verifier may show the BSOD in a loop, due to which the Windows may fail to open. So, we have a detailed guide to resolving the Driver Verifier Detected Violation error.
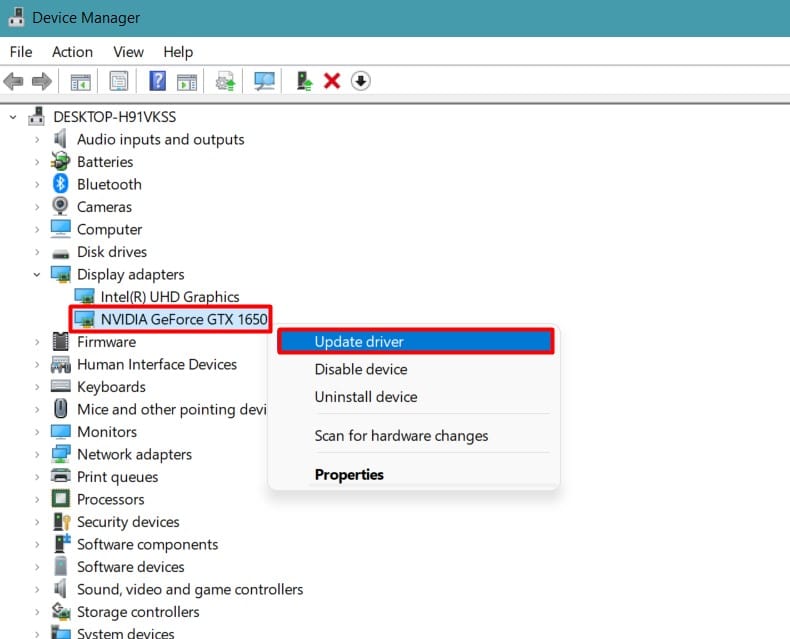
Uninstall and Reinstall Drivers
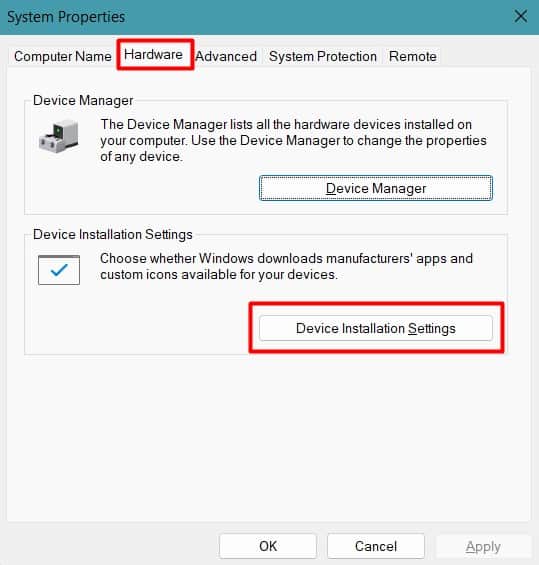
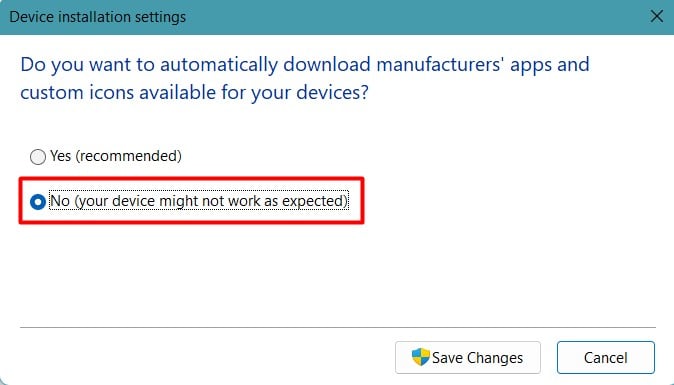
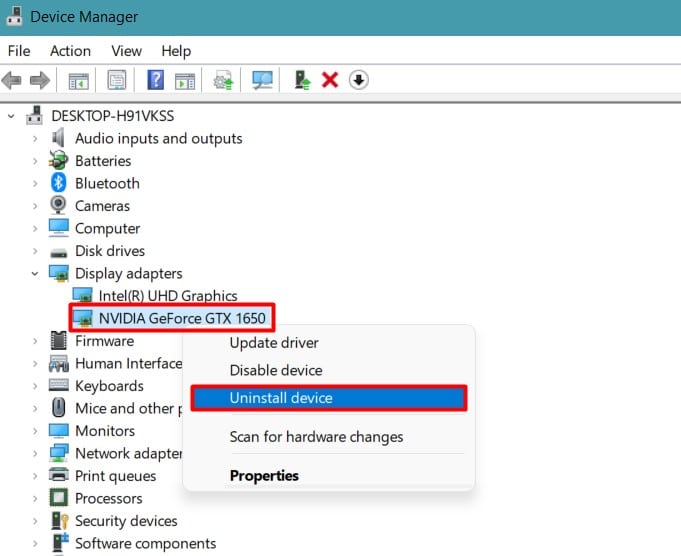
A corrupted driver may not be able to read the process causing the reference count of the pointer to increase or decrease abnormally in the memory. As a result, the BSOD appears in your system. Similarly, outdated drivers are equally responsible as they may not be compatible with your system or might have bugs. You can solve this by reinstalling or updating the drivers in your system. Most of the time, you can fix the issue if you update the drivers with faults, as shown by the driver verifier. Generally, this BSOD is found to be arisen by Graphics and Network card drivers. You can also uninstall the driver and reinstall it. But, we advise you to install the latest version from the manufacturer’s website. The driver installed automatically by the system may be outdated and may not bring any changes. So, you should first disable automatic driver installation and then proceed towards installing them manually. See if the problem still persists. If it does not work in regular mode, you can perform these operations in safe mode, as mentioned earlier.
Run Windows Memory Diagnostics Tools
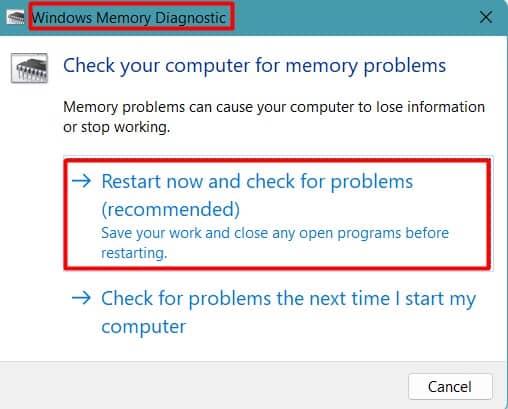
If the RAM has some errors, then the software may not be able to point to the object’s address appropriately, thus causing the error. So, you should check the memory for any problems by running the Windows Diagnostics tool. If the diagnostic test verified that you have some errors in your memory, then you can check the RAM and the memory slots. For that, try changing the slot if you have a single RAM. If you use dual RAM, you can use one at a time, trying both slots. You can also get a spare memory to see if that causes the BSOD to vanish. If you find that the memory is faulty, you may have to change the RAM. You should visit the nearest service point to fix such issues. However, before that, please go through the memory fixes below that you can try for yourselves.
Repair Corrupted System Files
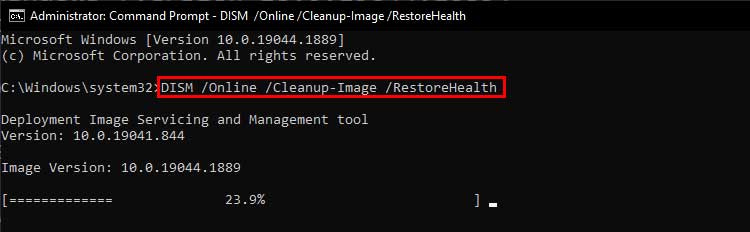
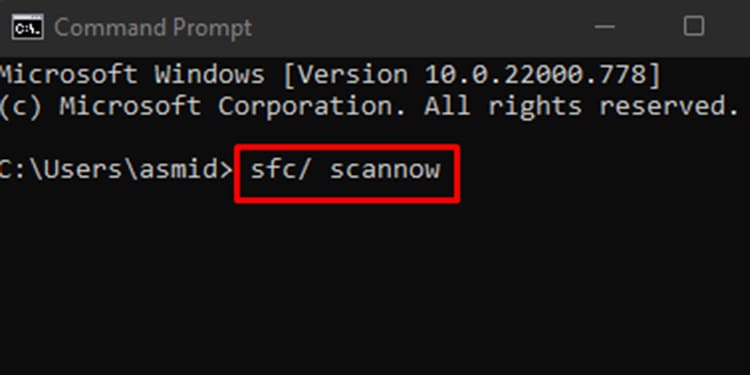
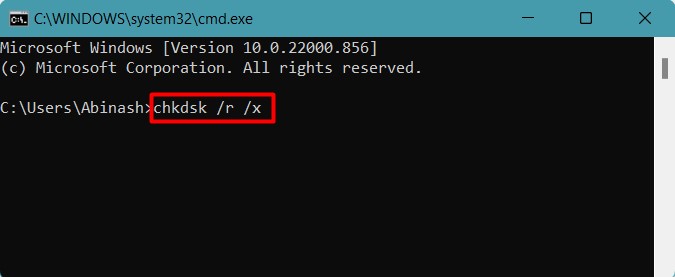
When the system runs any operation, it stores the processes in several memory addresses. If a system file gets corrupted, then it may keep reserving the address even after the task is completed. So, when a new process is started, the system may experience pointing errors to that address. You should run the following scans to repair the corrupt system files and solve the issue. Restart your system to see if the problem is resolved.
Remove Temporary Files
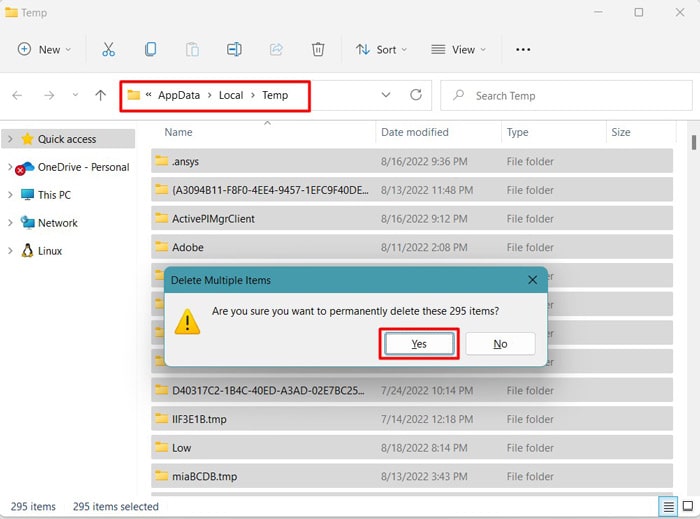
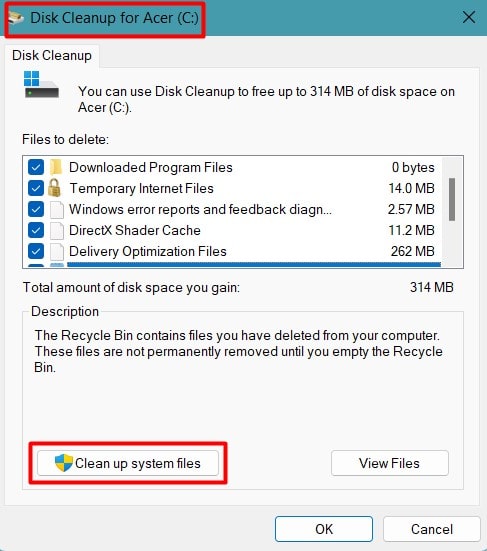
Your computer stores the loading configurations as cache and logs of any applications in Temp and Prefetch folders. If the information in those folders is corrupted, then the memory may be trying to retrieve such data, hence displaying the BSOD. You can easily empty these folders in the following ways. Examine if the problem still appears.
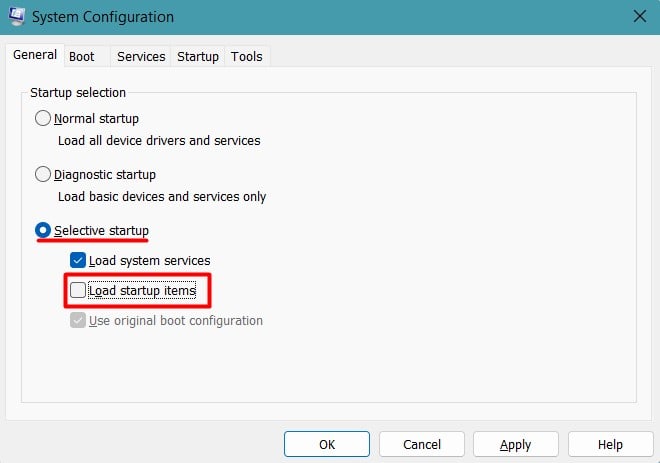
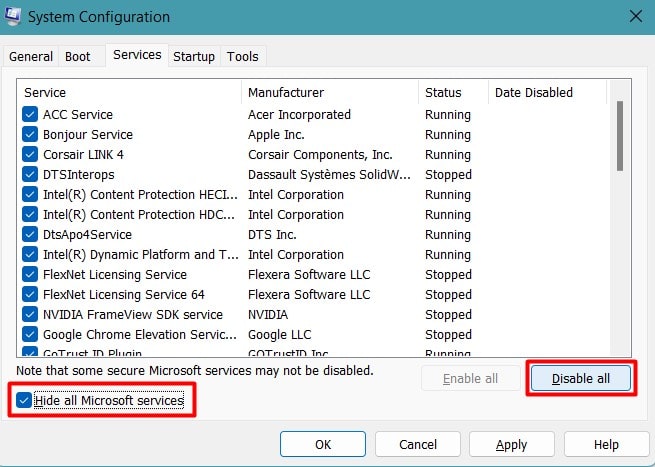
Perform Clean Boot and Remove Problematic Software
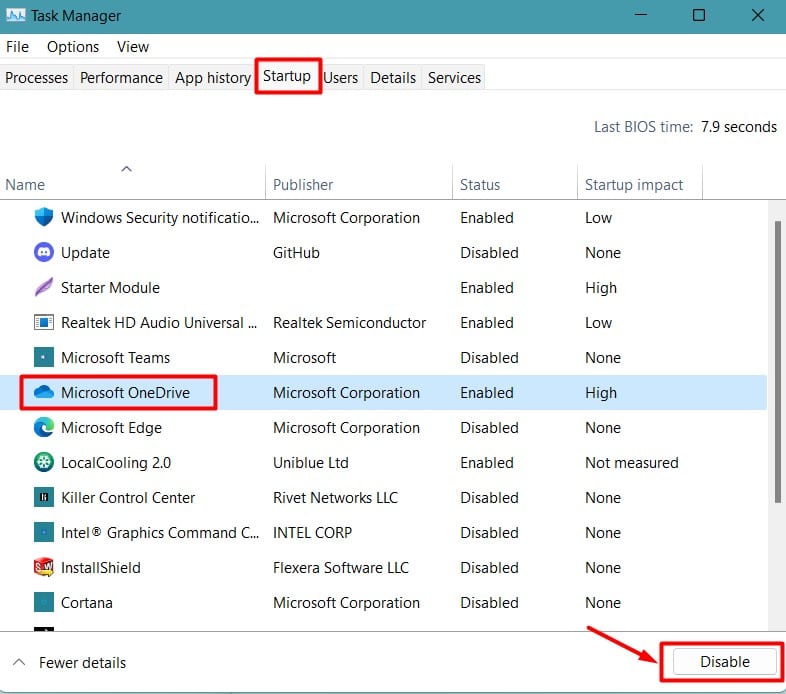
Usually, a lot of programs function in the background, and some run automatically, even from startup. To add to this, some programs may have faults in them, hindering the smooth system operation. This may cause the memory to malfunction and hence the BSOD. So, you should try performing a clean boot of your system and identify the software with fault by running them one by one. Let’s see how to do it. Use the system for a while and see if the BSOD appears. If the error does not show up, then open Task manager and start the programs individually to see which one causes the issue. Uninstall the program when you find the culprit. You can also remove any heavy software that may cause memory problems.
Disable Overclocking
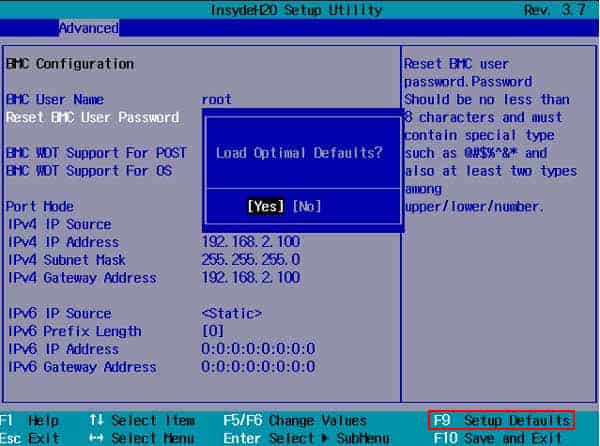
If you have overclocked your system to improve its performance, it may have stressed the system as well as overheated it. This can cause the system to misbehave, hence your meeting with the BSOD. You should revert the settings by simply resetting the BIOS or uninstalling the overclocking software. Examine if the BSOD appears again.
Run Virus Scan
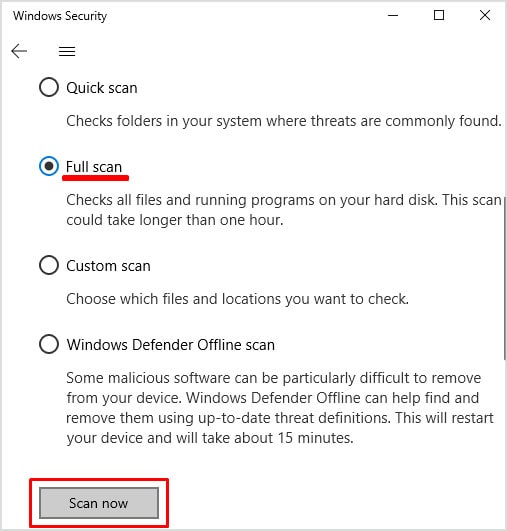
Remember COVID 19? Malware is just digital COVID. They corrupt the system files or occupy the memory unnecessarily, causing the computer to malfunction. You can perform a virus scan on your computer using the built-in Windows defender tool. You can also use third-party antiviruses to remove the malware. However, they use a lot of memory themselves. In addition to this, they can interfere with the driver software sometimes. This will cause the drivers to malfunction, and the BSOD will show up. So, in such a case, you should disable or uninstall the third-party antivirus software.
Perform System Restore
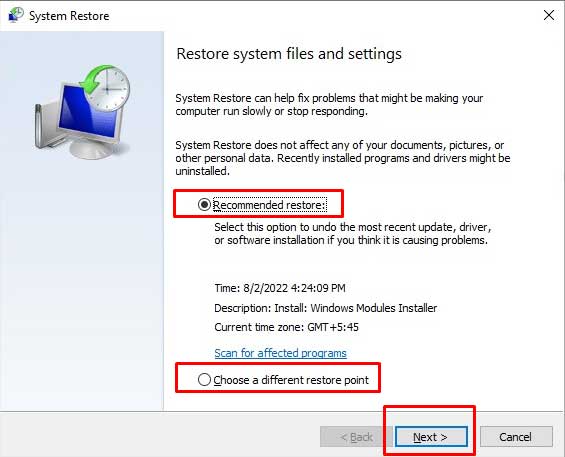
Whenever you install some unauthorized drivers or perform windows updates, the computer creates a restore point before installing them. It does so as a failsafe to avail an option to resolve any error afterward. Even if no such automatic points are created, the system makes one every week, and you also have an option to create the restore point manually. If the BSOD appeared after some updates or installation, you could try reverting your system back to the point where your computer was working fine. Let’s go through the process together. You should find the BSOD error fixed after the restore.
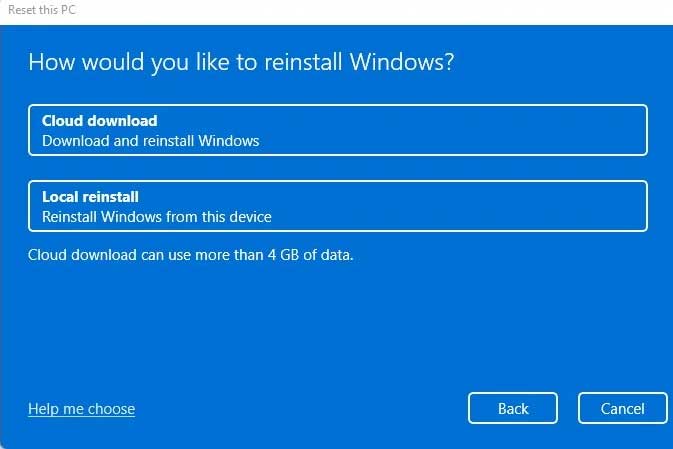
Reset or Reinstall Windows
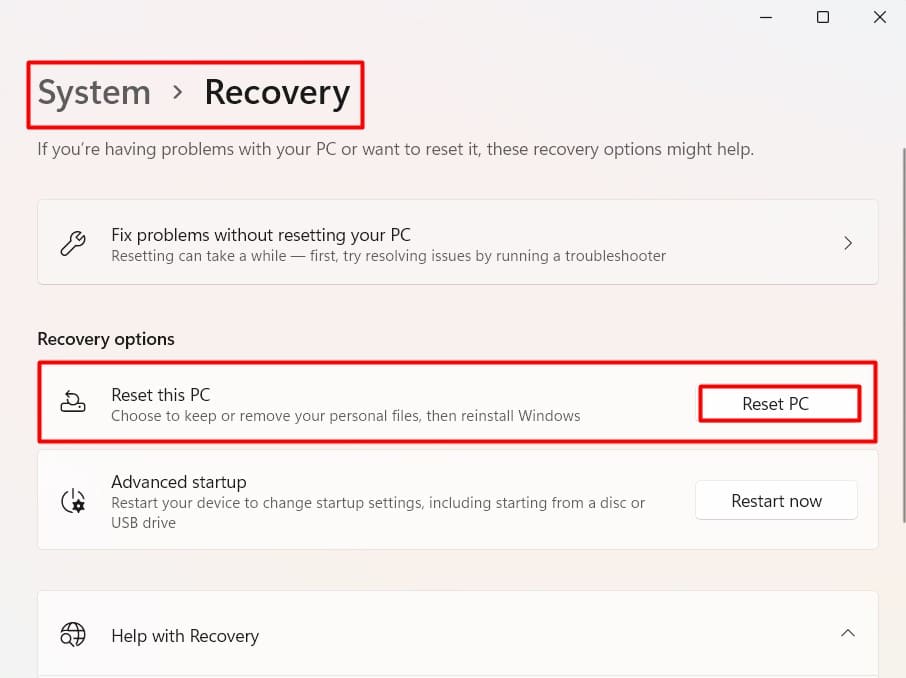
If the fixes did not resolve the BSOD error in your PC, you could reset your Windows. Let’s see how you can do it. If resetting does not work, you will have to install a fresh operating system on your PC.