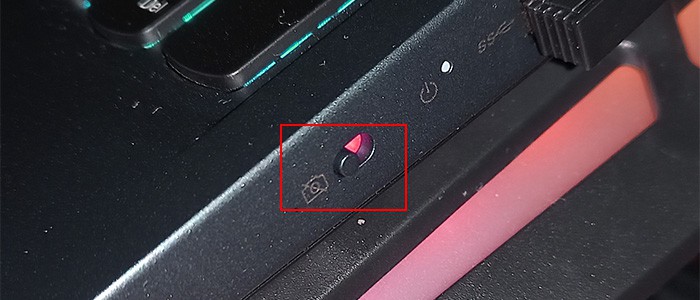
Lenovo computers also provide a dedicated switch to disable the camera for additional security, which you may have accidentally toggled off. In addition to these, there may also be other potential causes for the error. In this article, we discuss all such reasons in detail while providing their corresponding solutions.
Why is Lenovo Camera Not Working?
How to Fix Lenovo Camera Not Working?
If your camera works but the image is blurry, there may be a plastic film over it. If the camera doesn’t work at all, first, restart your PC and check if the camera starts functioning this time. If it doesn’t, try applying the possible solutions below to troubleshoot your issue.
Device disabled at hardware or software level.Restrictions due to disabled permissions.Other applications blocking access to the camera.Improper camera settings on the app.Camera or motherboard driver issues.Camera cable connection issues.Defective camera hardware.
Check Device Status
The first thing you need to do is check if the device is disabled or not. You should also try narrowing down whether it’s a software issue or a hardware one. Here are a few things you can do to perform both these tasks:
Make sure your Lenovo laptop has a built-in camera. It should be just over the screen.If you are using external cameras, check the connections as well as the On/Off switch on the device.It’s also better to change the ports for the external camera and try connecting it with other PCs as well.Many Lenovo laptops also include a slider or a switch for the webcam through which you can enable/disable the camera. If it’s over the webcam, it works as a shutter and if it’s on other areas, it works as an On/Off switch.Some laptops also have a key dedicated to enabling or disabling the camera. It’s usually a Function key that shows the camera icon with a diagonal strike-through over it. So, you need to press it and check if the camera starts working. In some devices, you need to press Fn plus that key.It is also possible that the camera is not working for a particular app only. You can check by opening the camera app. To do so, enter microsoft.windows.camera: on Run (don’t forget the colon ‘:’ on the command). If the device is actually not connected or disabled, it should show the 0xA00F4244 error.
If the device is enabled and you still encounter the error, move on to the successive solutions depending on the nature of your issue.
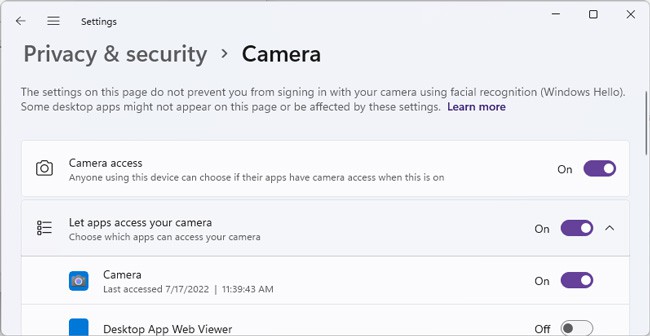
Check Camera Permission Settings
It is also possible that the apps or your system do not have access to the camera. You can check and change such options from your Privacy Settings. Here’s how you can do so:
Check App Settings
If the camera doesn’t work with a certain app only, it’s likely due to improper camera settings on the app. So, you need to go through its settings and make sure all the settings are what they should be. You can also check the application’s official website and look for any potential conflicts as well as what you can do to troubleshoot them.
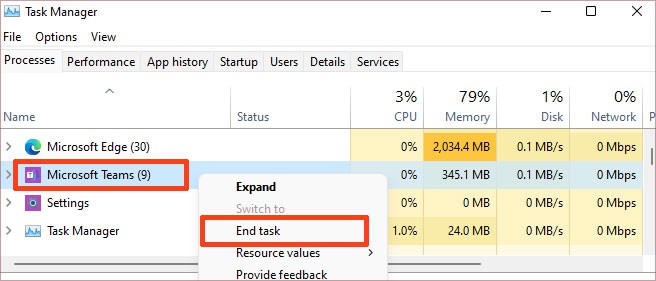
Close Conflicting Applications
If one of your active processes is still using the camera, you may not be able to use it with another process. To resolve such issues, you need to close those conflicting applications. It’s better to use the Task Manager to do so as some processes may stay active even after you close them. To do so, Now, check if the issue still reoccurs.
Troubleshoot in the Device Manager
In most cases, this camera error happens due to issues with its device drivers. So, you need to launch the Device Manager and perform the following troubleshooting measures to make sure everything is right and fix any potential errors.
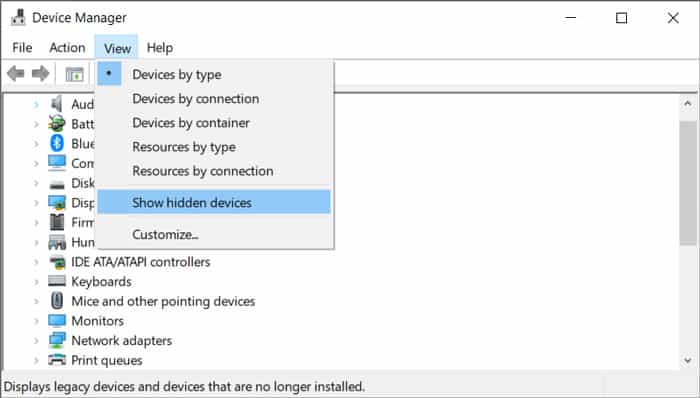
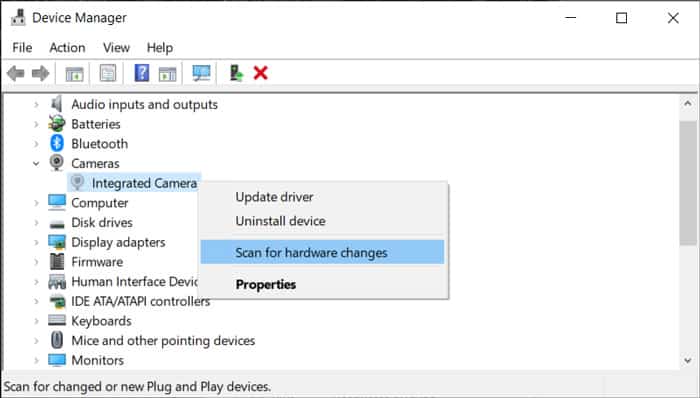
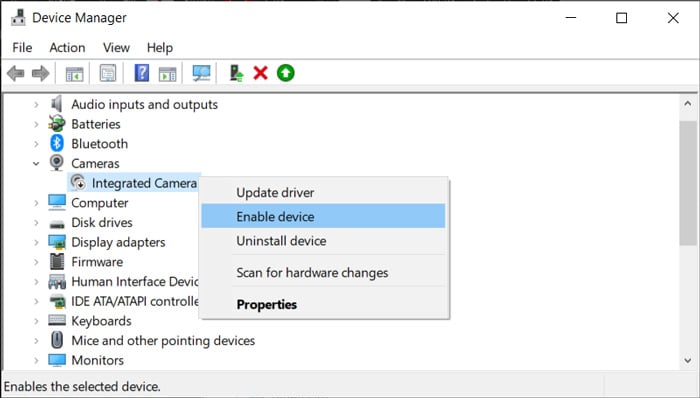
Check if Disabled or Missing
The first thing you should do is look for the camera device. At the same time, you can also check if the device is disabled or missing.
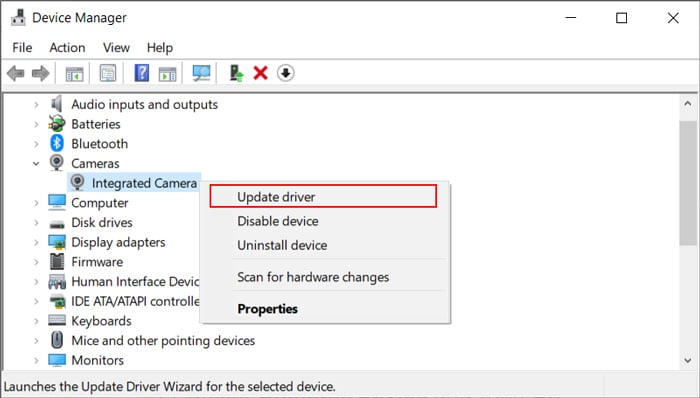
Update Driver
If the device is neither disabled nor missing, its driver software may have some issues. So first, try updating it. You can use the Windows update service to do so as we mention in the next method. However, you can also use the device manager for this purpose. If Windows cannot find the driver, you can try using the Lenovo Vantage app to search for the driver or install it directly from the official Lenovo website. You should also make sure to update your motherboard drivers these are required to use the peripheral devices properly. If you are using USB webcams, you need to update your USB drivers as well.
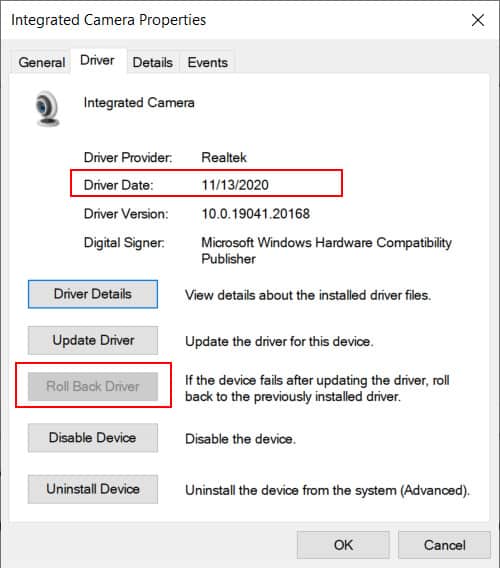
Rollback Driver
If you started encountering this issue after the camera driver update, you need to roll back the driver. To do so,
Reinstall Camera Driver
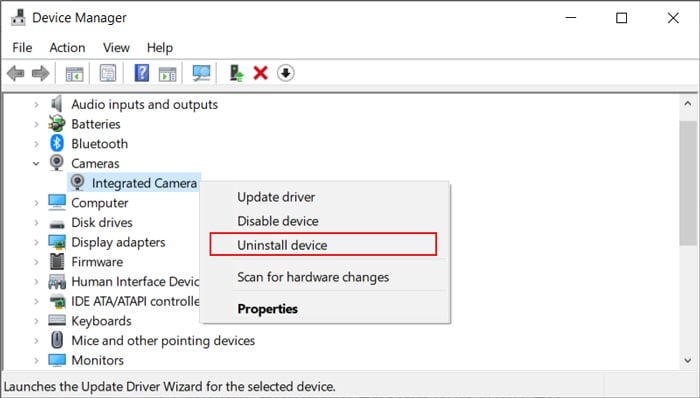
If you have the latest driver and it has been quite a while since the last driver update, you should try reinstalling the driver. It refreshes the driver and removes any potential bugs within its software. Here’s how you can do so: After uninstalling, restart your PC and open the Device Manager again. If the driver is missing, you need to install it from the official website.
Check for Malware
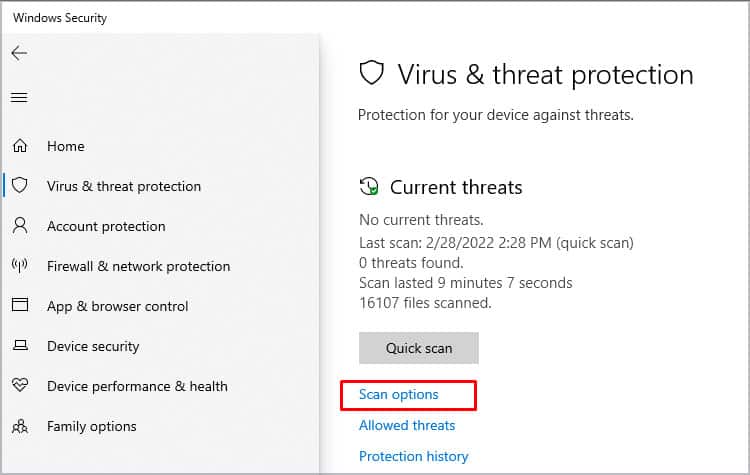
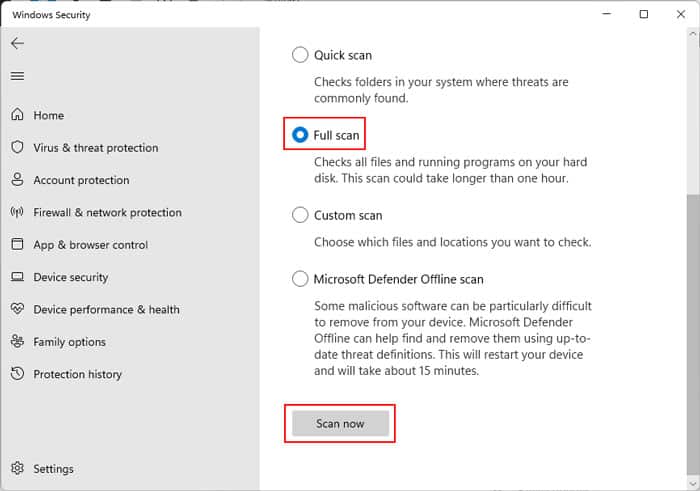
It is also possible that a malware script has infected the system files required to operate the camera or the apps that use the device, causing it to malfunction. You need to perform a full scan of your system in such scenarios. To do so using the built-in Windows Defender or Security app,
Update Your System
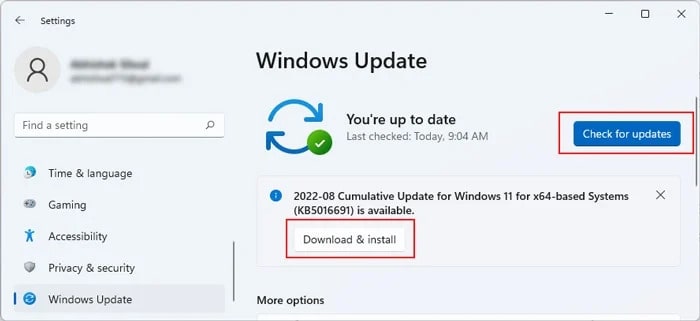
It is also possible that the camera driver shows some conflicts with the current OS version or any apps. In such cases, you need to keep your system fully updated as Microsoft patches most previous issues on the next updates. Here’s how you can manually update your OS: On a Lenovo device, you can also use the Lenovo Vantage application to update your Operating System.
Repair or Replace Device
If the device does not show up even in the device manager or your system settings, the device itself may be defective. It is also possible that the cable connecting the device and your PC has internal breaks or is loose. It is especially possible if we consider the integrated webcam. In such cases, you need to take your camera or laptop to a hardware expert to repair or replace the camera.
