If you encountered a BSOD crash due to this sys file, you will see it next to “What failed” on the error message below the actual stopcode or bugcheck. Usually, the classpnp.sys failure leads to exception-type BSODs like KMODE_EXCEPTION_NOT_HANDLED. However, it may also cause a different error. In this article, we provide the specific solutions you can apply whenever you get this issue.
What Causes Classpnp.sys BSOD error
How to Fix Classpnp.sys BSOD Error?
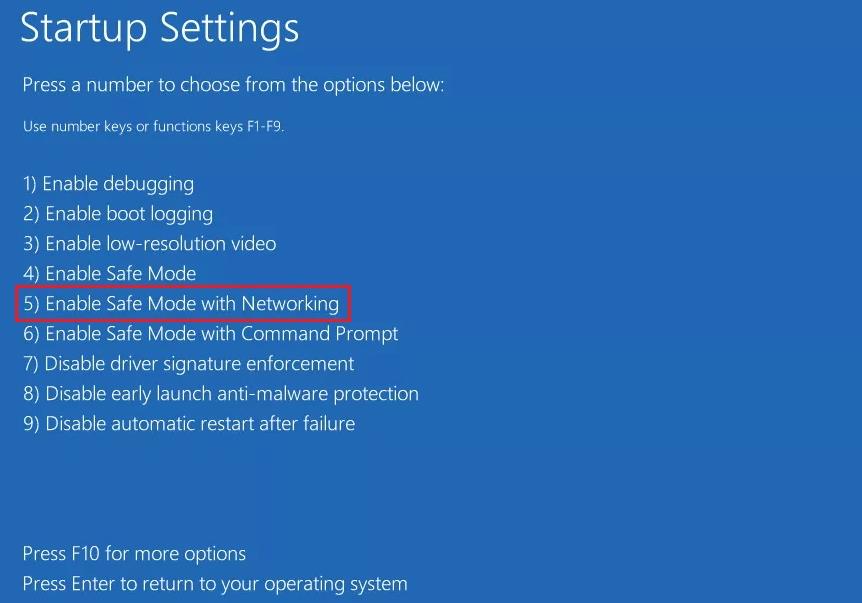
There are many possible fixes for this error, which we have provided below. Also, if you get stuck in a startup loop and can’t log in to perform these solutions, you need to boot in safe mode and carry them out. Here’s how you can do so:
Hardware failureProblematic device drivers.Outdated BIOS or firmware.Corrupt classpnp file.
Remove External Devices
Before moving on to the rest of the solutions, you should remove all external devices and then restart your PC. If the external device or its driver has some errors or is not compatible with your OS, removing the device will prevent it from affecting your system, thereby preventing this issue If you don’t encounter the BSOD after disconnecting the devices, first, narrow down the responsible device by connecting them one by one. Then, you need to update the culprit’s drivers. We also recommend checking the official website for compatibility issues.
Repair Corrupt System Files
It is also possible that the classpnp.sys file has become corrupt, causing this BSOD error. Or there may be other system file issues causing this file to fail. You can repair such corrupt Windows system files using the System File Checker (SFC) and the Deployment Image Servicing and Management (DISM) utilities. To do so,
Update or Uninstall Drivers
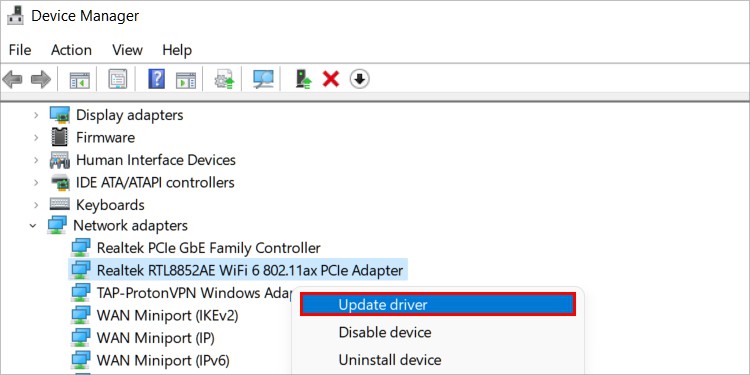
One of the main reasons for this error is corrupt or incompatible drivers. So, you need to make sure all your drivers are up to date, especially the storage, USB, and Ethernet controller drivers. To update your drivers, The drivers with errors usually show an exclamation mark. So look out for those. If the drivers are fully updated, you can try reinstalling them. Here’s how you can do so: Then, restarting your PC should reinstall the Microsoft drivers, but we recommend downloading them from the official websites. If some devices keep on showing the exclamation mark on the device manager, you should try removing or replacing them on your PC and check if the issue persists. If you aren’t confident in doing so by yourself, seek help from a hardware expert.
Replace Classpnp.sys
You can also try replacing the classpnp.sys file from another PC in case the file on your system is corrupt. You need to change the file’s permissions to delete or rename it before the replacement. So, we recommend creating a restore point before trying the method. Then, follow the instructions below: Then, go to this location on a fully functional PC and copy its classpnp.sys file to your computer.
Check RAM
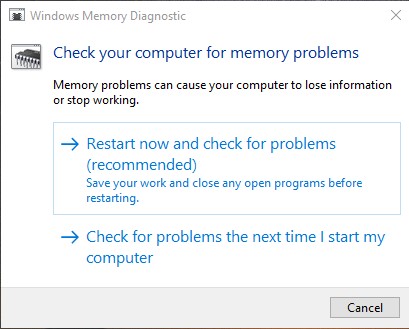
Defective RAM is one of the major causes of multiple BSOD crashes. So, it’s worth checking your RAM if you encounter this issue. Here’s how you can do so: The app starts testing your RAMs after restarting and you need to reboot again as soon as the test completes. Then, on the next boot, it displays the error message. If it shows that there are some errors, you need to check whether one of your RAM sticks or slots is defective. You can do so by checking different RAMs on different slots individually. After narrowing it down, you need to replace the device. Some hardware experts might be able to repair the slots, it’s better to seek the help of such technicians to check them before buying a new device.
Check Hard Disk
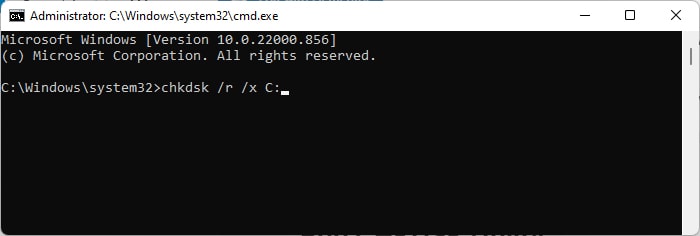
This BSOD can also occur if there are some issues with your HDD or SSD. The sectors where the file is stored might have become corrupt. But it is also possible that your storage disk is failing, causing this issue. You need to check the disk’s health by running the CHKDSK utility in such a scenario. Here’s how you can do so: Then, check all your partitions by replacing the drive letter with the proper one in the same command. If CHKDSK detects errors on the disk but fails to repair them, your disk is failing.
Update BIOS
The hardware failures may also indicate outdated BIOS rather than problems with the device itself, especially if you started encountering this issue after installing a new device. You should check the compatibility of all the devices with your BIOS version and update it if necessary. First, check your BIOS version by using the steps below: Then, visit your device manufacturer’s website to determine the minimum BIOS specification you need to operate it. If your BIOS version is older, you need to update the BIOS. However, be careful while doing so as any errors with the process can brick your ROM.
Run System Restore
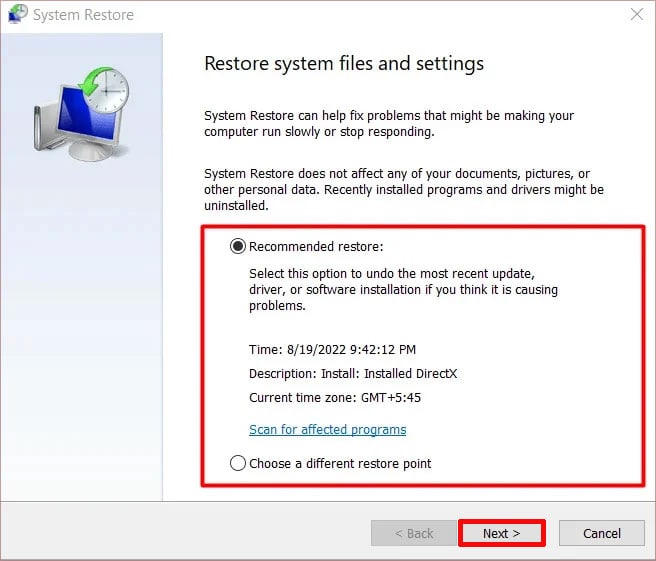
If the previous solutions were not helpful for your scenario, you should restore your system back to an appropriate state. Doing so resolves any system issues that are not caused by hardware faults. Here’s how to restore your system: If you can’t run System Restore, you need to clean install Windows. Before that, we recommend you back up all necessary data in your system. If you can’t log in to your PC, try doing so in safe mode. If you can’t even boot in safe mode, try connecting your disk to another computer or booting your PC using Linux Live USB and backing up the files.
